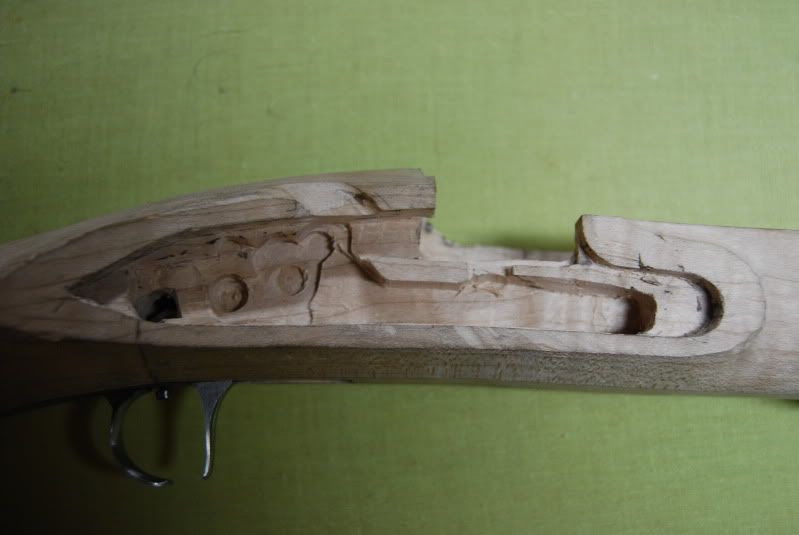
It was bound to happen sooner than later. Just like when I buy a new car, the first dent is inevitable. But I always feel better after getting it out of the way! LOL.
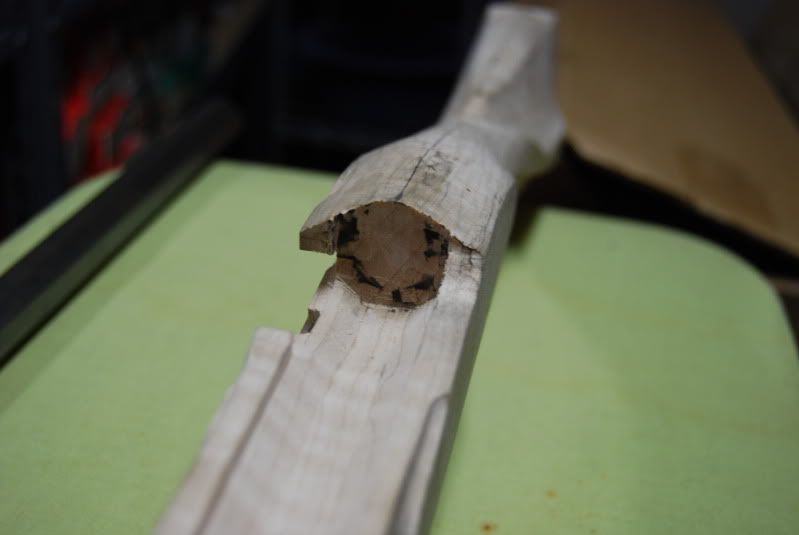
I was starting to inlet the tang on the breech plug after installing it on the barrel. I started chisel working the inlet and just hit the chisel with the hammer just a little bit to hard and off came a chunk of wood right where everyone can see it! Right smack on top of the wrist where the wood will meet the tang. Dang it!
So, out comes the new bottle of Elmer's Wood glue (I was planning ahead) and after cutting the notch deeper, I glued the piece back in place and I'm letting it sit at least overnight but probably let it set for a day or two. I don't expect it to be perfect but I'm doing my best.
This is, after all, my First handbuilt rifle right? LOL.
I'll try to get some more pictures up soon.
Friday, October 23, 2009
Sunday, October 18, 2009
Working on the Lock inletting
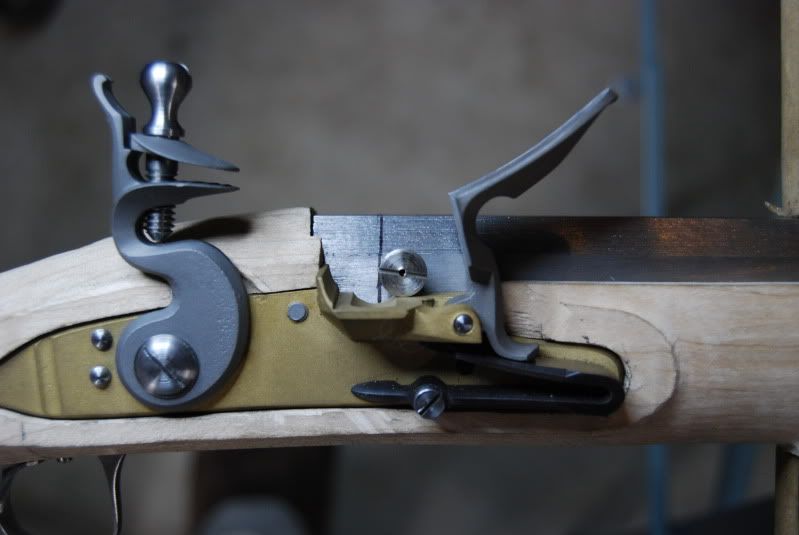
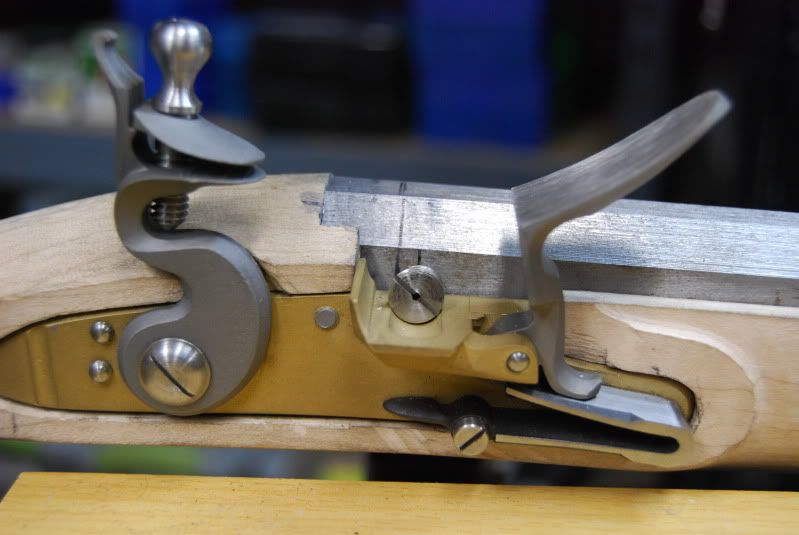
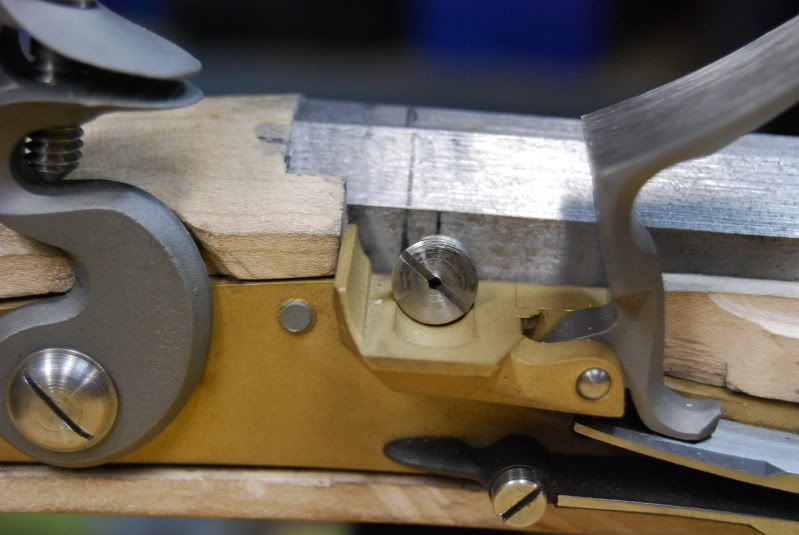
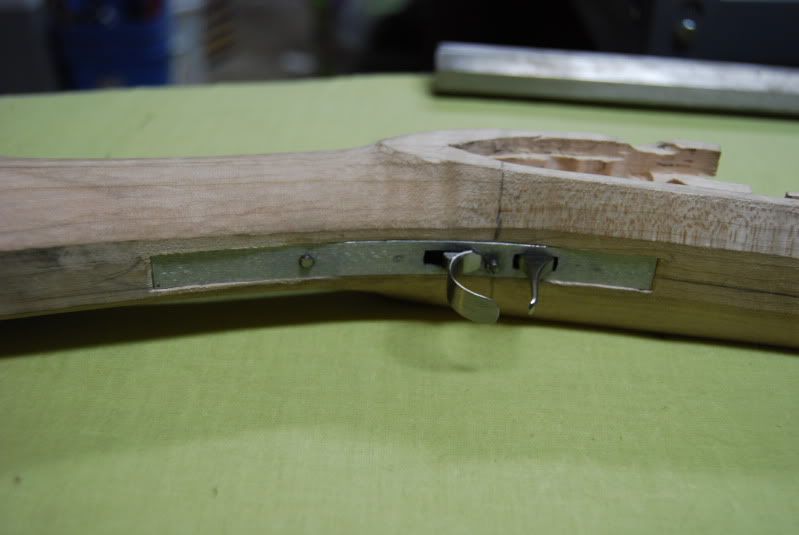
After setting back the barrel to almost the perfect position to line up the proposed position of the flash hole and flash hole liner, I turned my attentions to inletting the Lock to it's final location.
I was a bit disappointed that I couldn't seem to get the lock to sit square and systematically remove wood as needed. I found that the hammer and cock assembly was just too much in the way. I did some research and learned that the "proper" way to inlet the lock was to actually take the hammer assembly off (so it is not in the way - DUH!).
Using a vise grips (instead of the recommended spring vise) I was able to easily remove the spring used for the hammer. I unscrewed the one pivot screw and viola, a nice flat lock plate to work with.
Now, I wanted to try to do this with as few "power tools" as possible but, I just may have to break out the dremel tool to get into the small nooks and crannies. We'll see how it goes.
Wednesday, October 14, 2009
Inletting the barrel
As mentioned earlier, I ordered the stock with the inletting already done for the barrel, trigger and lock. So most of the inletting was already done for me.
Here is the lock and barrel in place with me holding the breech plug approximately where it's going to end up in the stock. I've marked a line where the breech face will be after the breech plug is installed so I know where the flash hole liner will need to be.

Here is the same view with he flash hole liner laying on the barrel in the location it would need to be installed in order to miss the breech face (marked with the black line)
It's obvious, the barrel needs to be moved back so the flash hole liner is centered with the flash pan.
After a lot of carving and careful measuring and some filing and so on, I was able to get the barrel to inset further back by about 1/8". As you can see now, the mark for the centerline of the flash hole liner is now center with the flash pan. I'll take off just a little bit more before installing the flash hole liner but I'm going to leave that little bit for later (it's easier to take more off than put some back on...)
Here is the lock and barrel in place with me holding the breech plug approximately where it's going to end up in the stock. I've marked a line where the breech face will be after the breech plug is installed so I know where the flash hole liner will need to be.
Here is the same view with he flash hole liner laying on the barrel in the location it would need to be installed in order to miss the breech face (marked with the black line)
It's obvious, the barrel needs to be moved back so the flash hole liner is centered with the flash pan.
After a lot of carving and careful measuring and some filing and so on, I was able to get the barrel to inset further back by about 1/8". As you can see now, the mark for the centerline of the flash hole liner is now center with the flash pan. I'll take off just a little bit more before installing the flash hole liner but I'm going to leave that little bit for later (it's easier to take more off than put some back on...)
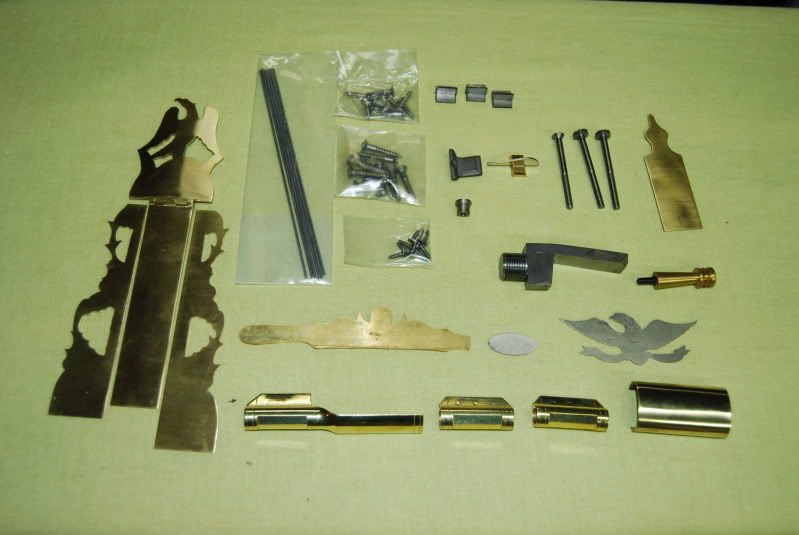
Parts - Brass and "Furniture"
Here is the complete parts bag emptied and posed for the camera. It includes all the screws, insets, ram rod pipes and patchbox parts and so on.
I saw this and started digging around for the instructions quick! But there are none, this is a PARTS kit, not a DROP-IN KIT!! (what have I gotten myself into?)
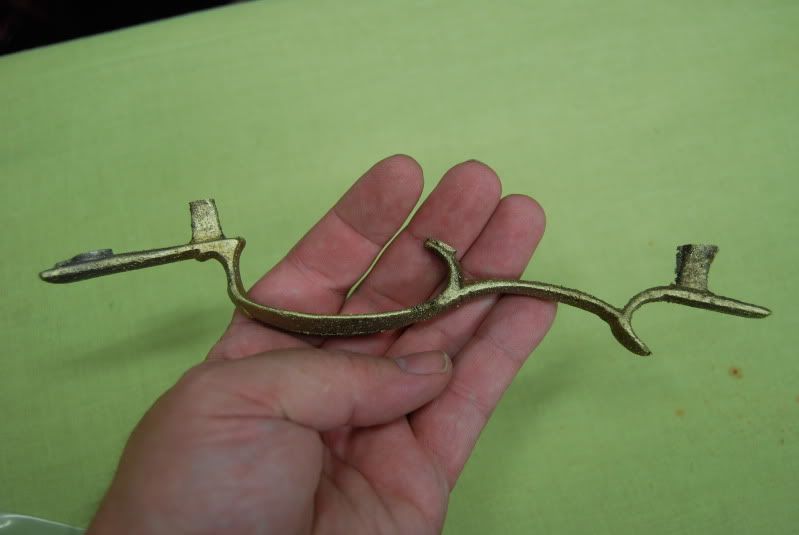
This is the very nice Brass Patch Box comprised of three parts. This will be installed on the right hand side of the buttstock and will enclose a recessed box known as a patchbox for storing little bits and pieces needed in the field for reloading or repairs.
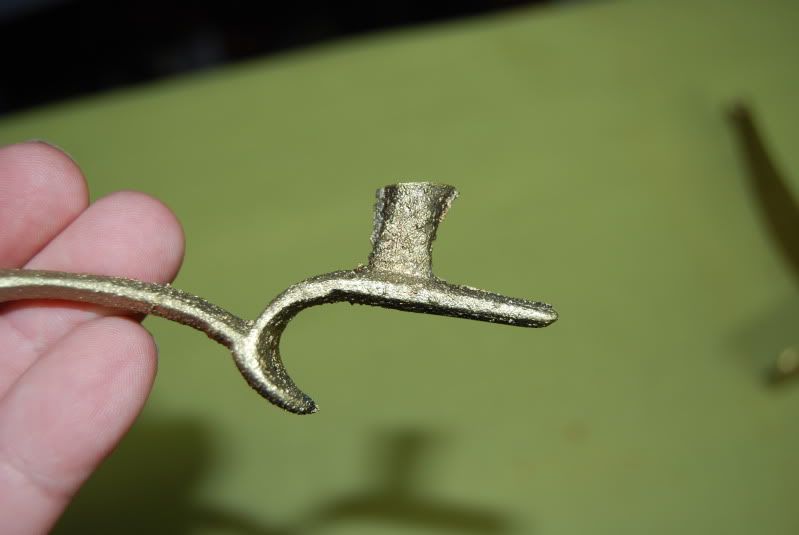
It is just a silhuette and looks nice as is, but really should have engraving done to it to make it perfect.

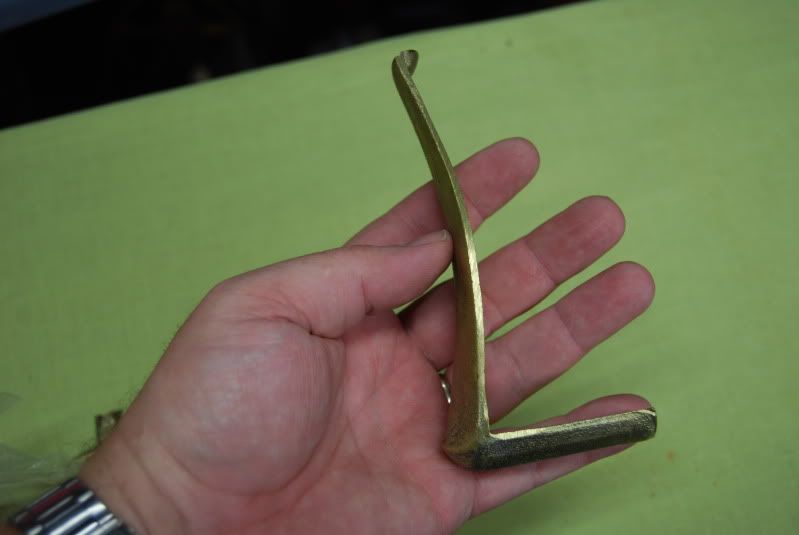
The Trigger Guard is Brass and is as cast, meaning it is ROUGH and nowhere near ready to be installed
A close look at trigger guard shows a lot of work needs to be done yet.
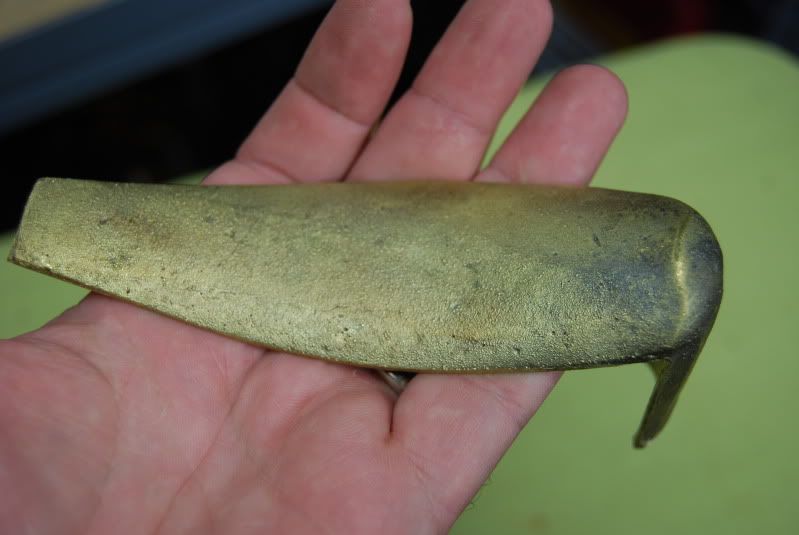
The Buttplate is solid brass and I will definitely be doing a lot of filing and sanding on this piece.
Another view of the Buttplate
I saw this and started digging around for the instructions quick! But there are none, this is a PARTS kit, not a DROP-IN KIT!! (what have I gotten myself into?)
This is the very nice Brass Patch Box comprised of three parts. This will be installed on the right hand side of the buttstock and will enclose a recessed box known as a patchbox for storing little bits and pieces needed in the field for reloading or repairs.
It is just a silhuette and looks nice as is, but really should have engraving done to it to make it perfect.
The Trigger Guard is Brass and is as cast, meaning it is ROUGH and nowhere near ready to be installed
A close look at trigger guard shows a lot of work needs to be done yet.
The Buttplate is solid brass and I will definitely be doing a lot of filing and sanding on this piece.
Another view of the Buttplate
The Parts - Lock
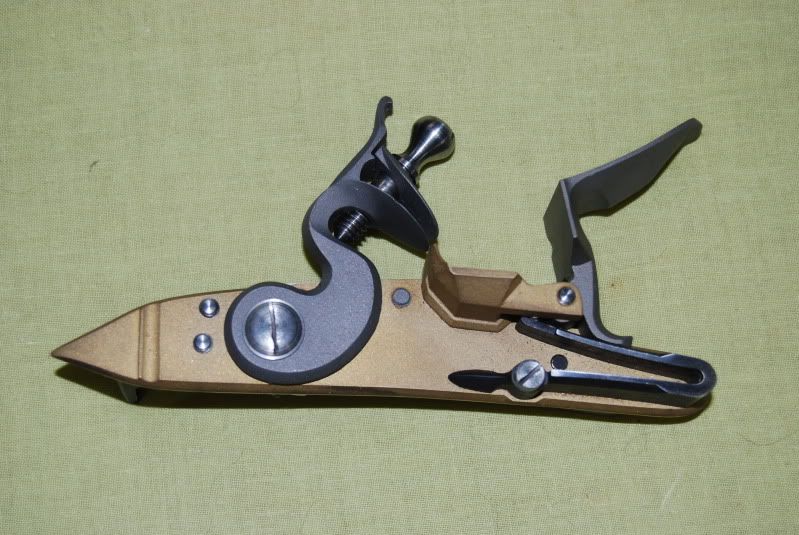
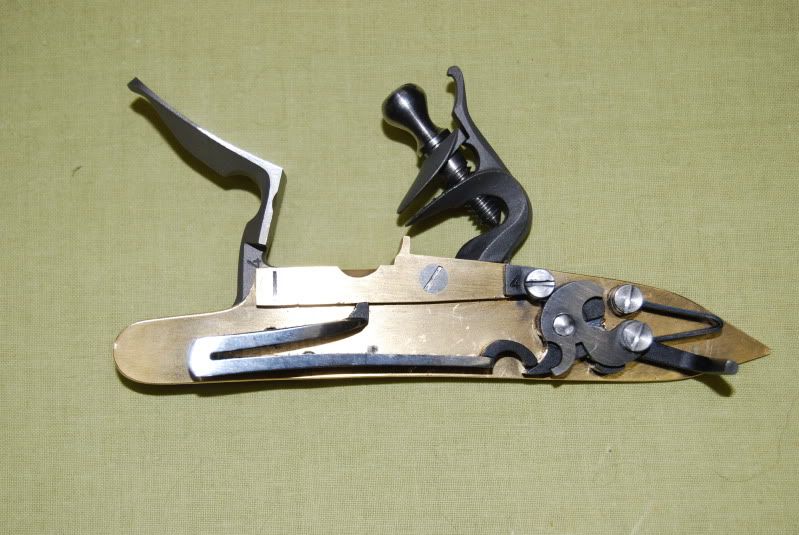
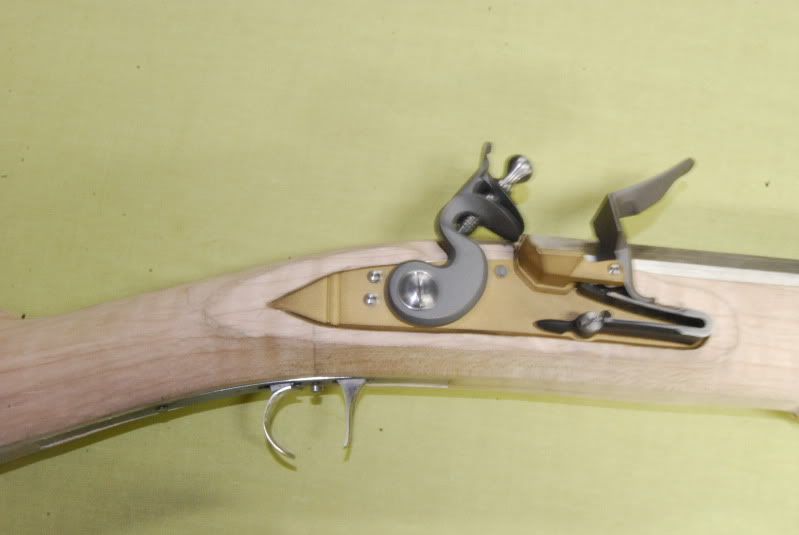
The Lock made by Siler:
This is a brass plate flintlock which looks good right out of the box.
In the old days, these were made in Germany or assembled by German migrant gunsmiths or a combination of imported parts and what may be laying around the shop. I'm sure if I'm supposed to leave it as is or if I will need to dress it up a bit. Time and more questions will tell.
Front
Back
Installed in the stock
My Lancaster Project
Many years ago I put together a "kit" flintlock rifle from CVA (I think that was the name). That was a couple of decades ago!
I've since raised a family, built a good career and have been a very avid collector of modern firearms. I also handload many different calibers of ammunition for everything from self defense to competition and hunting.
Recently some legislation has been passed regarding the Internet sales of ammunition as well as the components to reload. That got me to thinking if I want to continue enjoying my firearms hobby I may want to expand into a category that may not get legislated into oblivion.
I already have a store bought Hawkin's caplock 50 cal muzzle loading rifle and a caplock Remington Army clone. I enjoy shooting both and began looking around for clubs and such. I happened upon a few very nice forums where muzzle-loaders were being discussed and I got bit hard by the builder's bug. I just HAD to build my own rifle. And not just put together one from a drop in "kit" either. I had already done that while in my teens and was very simple. I wanted a real challenge.
After a lot of reading, asking a bunch of questions, I ordered what is commonly called a "parts kit" as opposed to a "drop in kit". The difference being you get your parts about as raw as they come from the manufacturer. Nothing is finished or put together in a parts kit. Whereas the "drop in kit" is about 80% done and all your really have to do is some finish sanding, some bluing of the metals and put a finish on your wood. I did one when I was about 17 and it only took me about a month of evenings in my parent's garage. Being stupid, (and needing gas money) I sold it about a year later. I got a great price for it and I hope the guy that bought it got a lot of enjoyment out of it.
The parts kit I bought this time round came from "Muzzleloader Builders Supply" (http://www.muzzleloaderbuilderssupply.com)
I spoke to Ryan (the owner) and we spent almost an hour on the phone picking out the parts I wanted to not only build a period correct firearm, but make it uniquely my own.
Due to my own choices, some of what I wanted was special order and I had to wait for them to come in. I told him to wait and ship everything at one time and no hurry, this is a hobby. He seemed to appreciate that little bit of customer curtiousy (rare these days of "give it to me now!" customers). After all, in the days these rifles were first being built, a gunsmith had to wait for parts to ship clean from Germany or England or France. Needless to say, this could take over a year! A few weeks were no big deal.
I am hoping I can document the build process from beginning to end here for my own enjoyment and hopefully yours as well.
The Rifle is based on the Lancaster school of gun-makers. It represents the Kentucky or Pennsylvania rifle in it's Golden age. When talking about the Kentucky or Pennsylvania rifle it's usually about the same style rifle. Remember, Kentucky was a huge area of land back then!
There is a lot of info to read on the Internet about these rifles and the builders. I won't even try to write about them here. I'm not an expert, simply a student of the art building my first serious project.
And now for your pleasure:
The Parts
Here is a picture of the overall Barrel and Stock as I got them. They're very long so were hard to get a good overall picture of. I was taking all the other parts pictures with the green background on my ironing board so I just kept it on the board instead of the concrete floor of my shop.
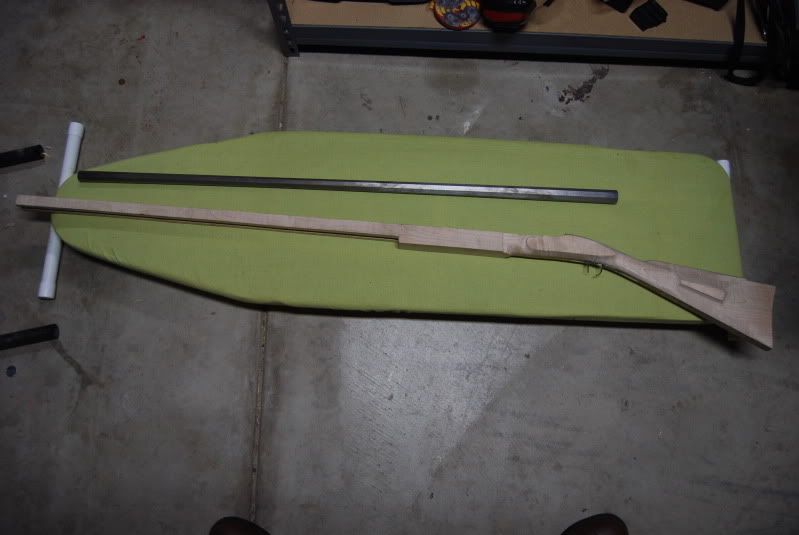
My Toes are a bonus LOL.
Some closer views of the stock:
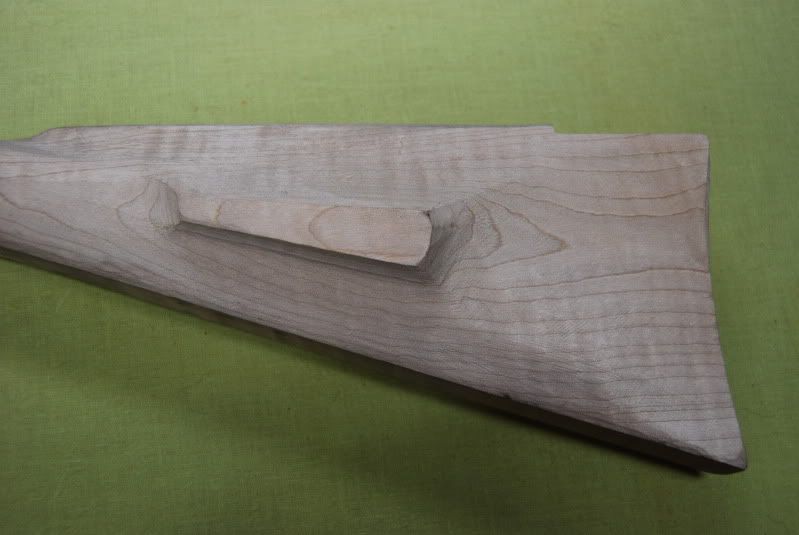

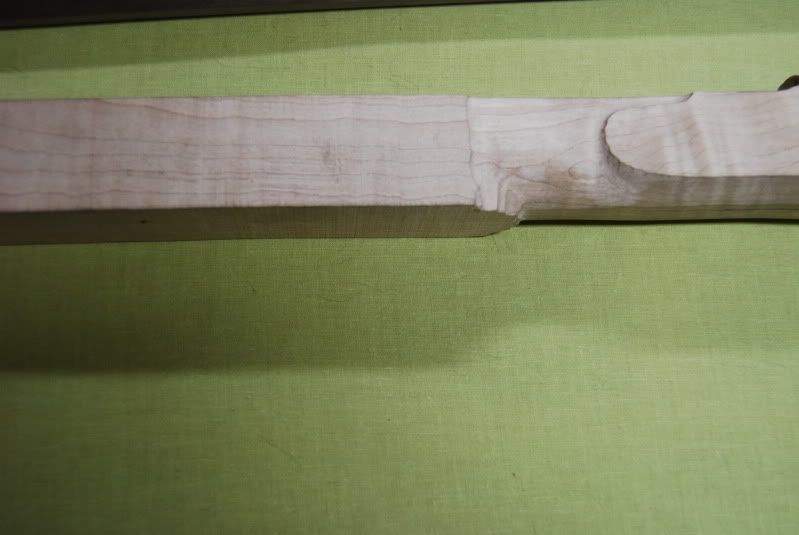
I ordered the stock with the lock already inlet:
As well as the trigger and barrel channel:
I've since raised a family, built a good career and have been a very avid collector of modern firearms. I also handload many different calibers of ammunition for everything from self defense to competition and hunting.
Recently some legislation has been passed regarding the Internet sales of ammunition as well as the components to reload. That got me to thinking if I want to continue enjoying my firearms hobby I may want to expand into a category that may not get legislated into oblivion.
I already have a store bought Hawkin's caplock 50 cal muzzle loading rifle and a caplock Remington Army clone. I enjoy shooting both and began looking around for clubs and such. I happened upon a few very nice forums where muzzle-loaders were being discussed and I got bit hard by the builder's bug. I just HAD to build my own rifle. And not just put together one from a drop in "kit" either. I had already done that while in my teens and was very simple. I wanted a real challenge.
After a lot of reading, asking a bunch of questions, I ordered what is commonly called a "parts kit" as opposed to a "drop in kit". The difference being you get your parts about as raw as they come from the manufacturer. Nothing is finished or put together in a parts kit. Whereas the "drop in kit" is about 80% done and all your really have to do is some finish sanding, some bluing of the metals and put a finish on your wood. I did one when I was about 17 and it only took me about a month of evenings in my parent's garage. Being stupid, (and needing gas money) I sold it about a year later. I got a great price for it and I hope the guy that bought it got a lot of enjoyment out of it.
The parts kit I bought this time round came from "Muzzleloader Builders Supply" (http://www.muzzleloaderbuilderssupply.com)
I spoke to Ryan (the owner) and we spent almost an hour on the phone picking out the parts I wanted to not only build a period correct firearm, but make it uniquely my own.
Due to my own choices, some of what I wanted was special order and I had to wait for them to come in. I told him to wait and ship everything at one time and no hurry, this is a hobby. He seemed to appreciate that little bit of customer curtiousy (rare these days of "give it to me now!" customers). After all, in the days these rifles were first being built, a gunsmith had to wait for parts to ship clean from Germany or England or France. Needless to say, this could take over a year! A few weeks were no big deal.
I am hoping I can document the build process from beginning to end here for my own enjoyment and hopefully yours as well.
The Rifle is based on the Lancaster school of gun-makers. It represents the Kentucky or Pennsylvania rifle in it's Golden age. When talking about the Kentucky or Pennsylvania rifle it's usually about the same style rifle. Remember, Kentucky was a huge area of land back then!
There is a lot of info to read on the Internet about these rifles and the builders. I won't even try to write about them here. I'm not an expert, simply a student of the art building my first serious project.
And now for your pleasure:
The Parts
Here is a picture of the overall Barrel and Stock as I got them. They're very long so were hard to get a good overall picture of. I was taking all the other parts pictures with the green background on my ironing board so I just kept it on the board instead of the concrete floor of my shop.

My Toes are a bonus LOL.
Some closer views of the stock:
I ordered the stock with the lock already inlet:
As well as the trigger and barrel channel:
Subscribe to:
Posts (Atom)